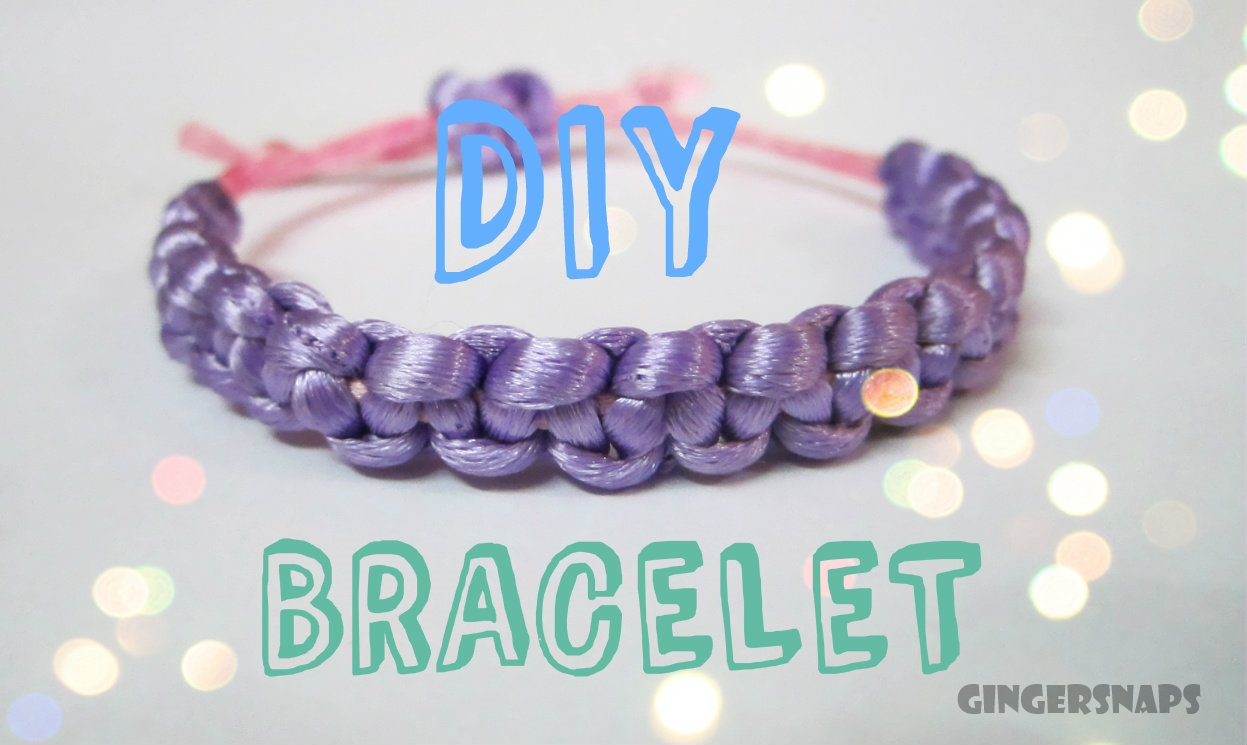
Today
I am doing a tutorial on how to make this really pretty square knot bracelet, which is great for stacking up as arm candy and also the most gorgeous idea to gift to your best friends with Friendship Day right around the corner!
Things you will need:
Colorful Strings (Preferably thick)
Tape, Glue, Scissors
That's about it.
This may look complicated at first glance but believe me, follow these instructions and you should be just fine.
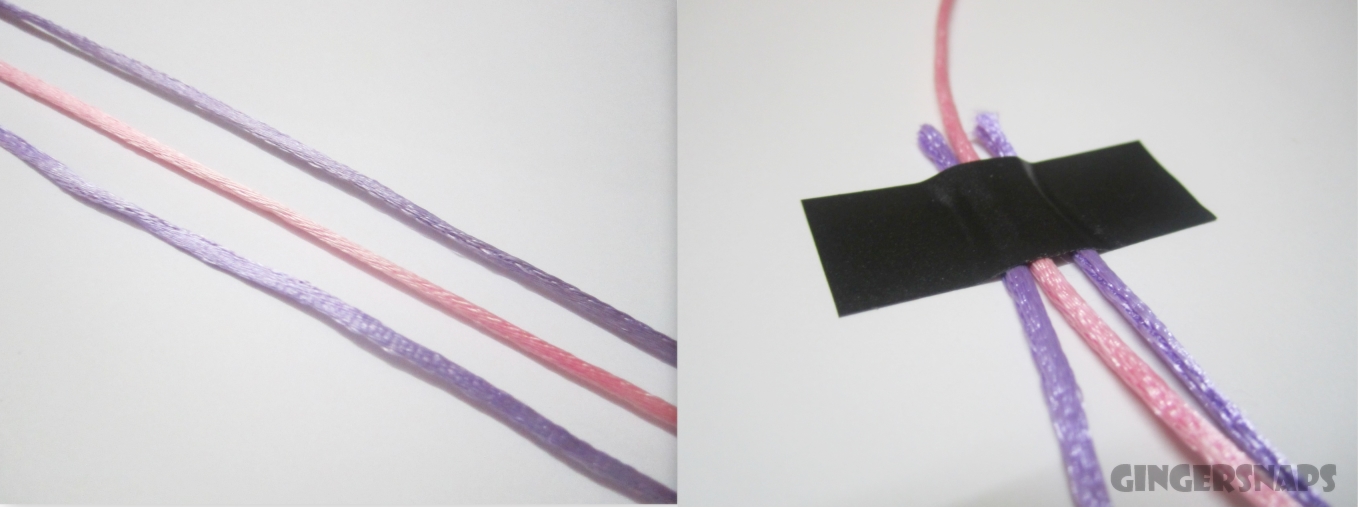
You are going to need three strings to make this bracelet. I am using the colors lavender and pink. The length of the middle string should be around 2-3 times your wrist measurement, and the length of the other two strings should be around 5-7 times your wrist measurement. I am going to refer to the middle string (the pink one) as the base string.
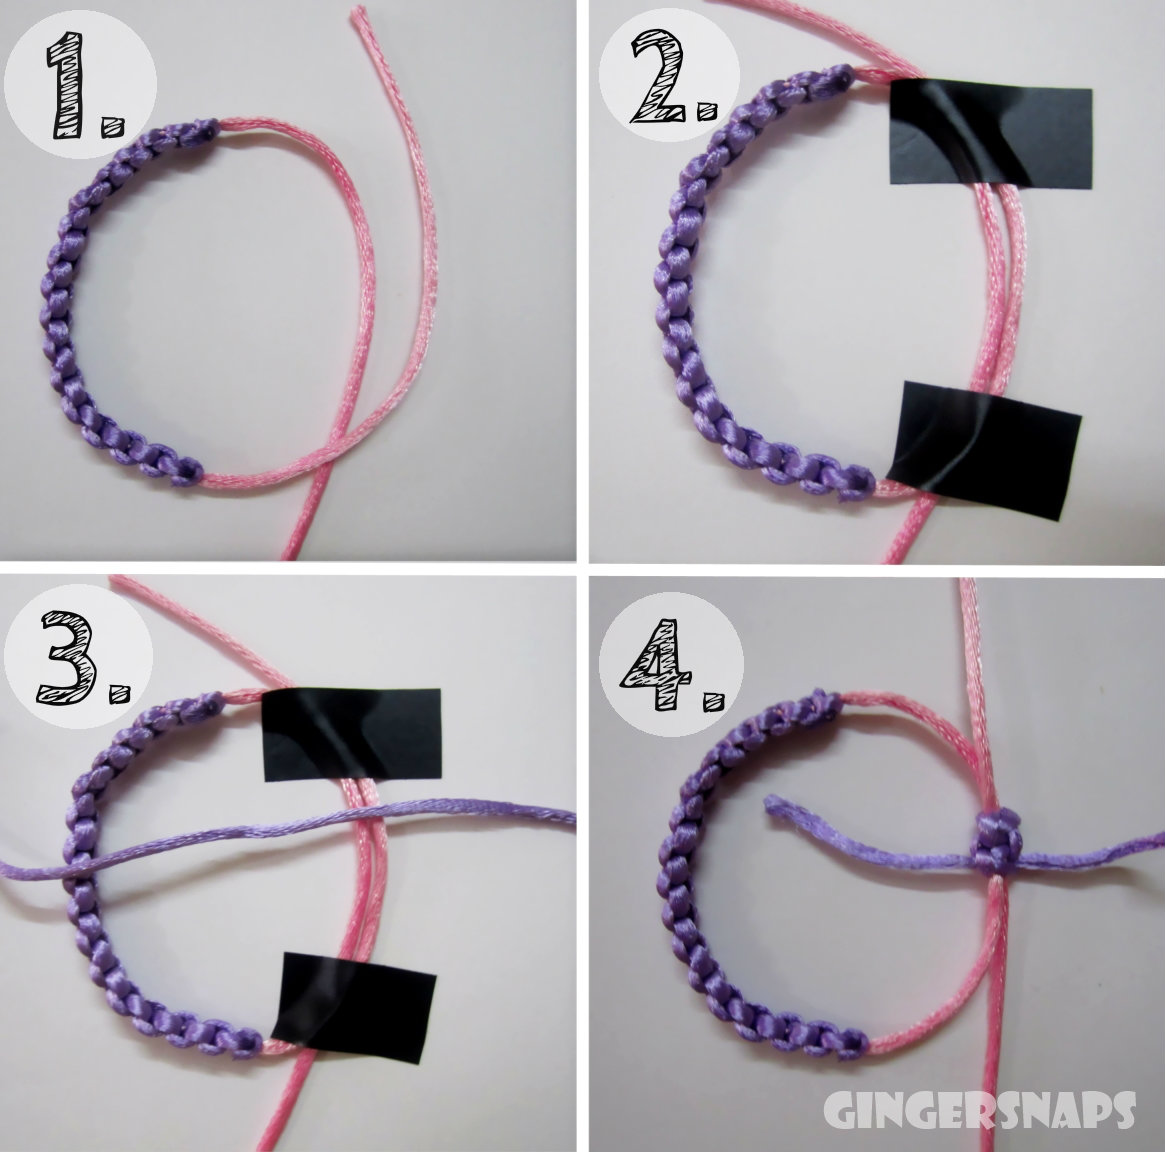
- To start with, leave out a couple of inches of the base string and tape it at one end. Now keep the base string loose and tape it on the other end too.
- Take the other two strings and tape it with the starting end (the end in which we have left a couple of inches sticking out) of the base string as shown in the image above.
I'll repeat again, only the base string needs to be taped at both the ends, the other two strings are only going to be taped on one end.
Now let's move on to how to make the square knots.
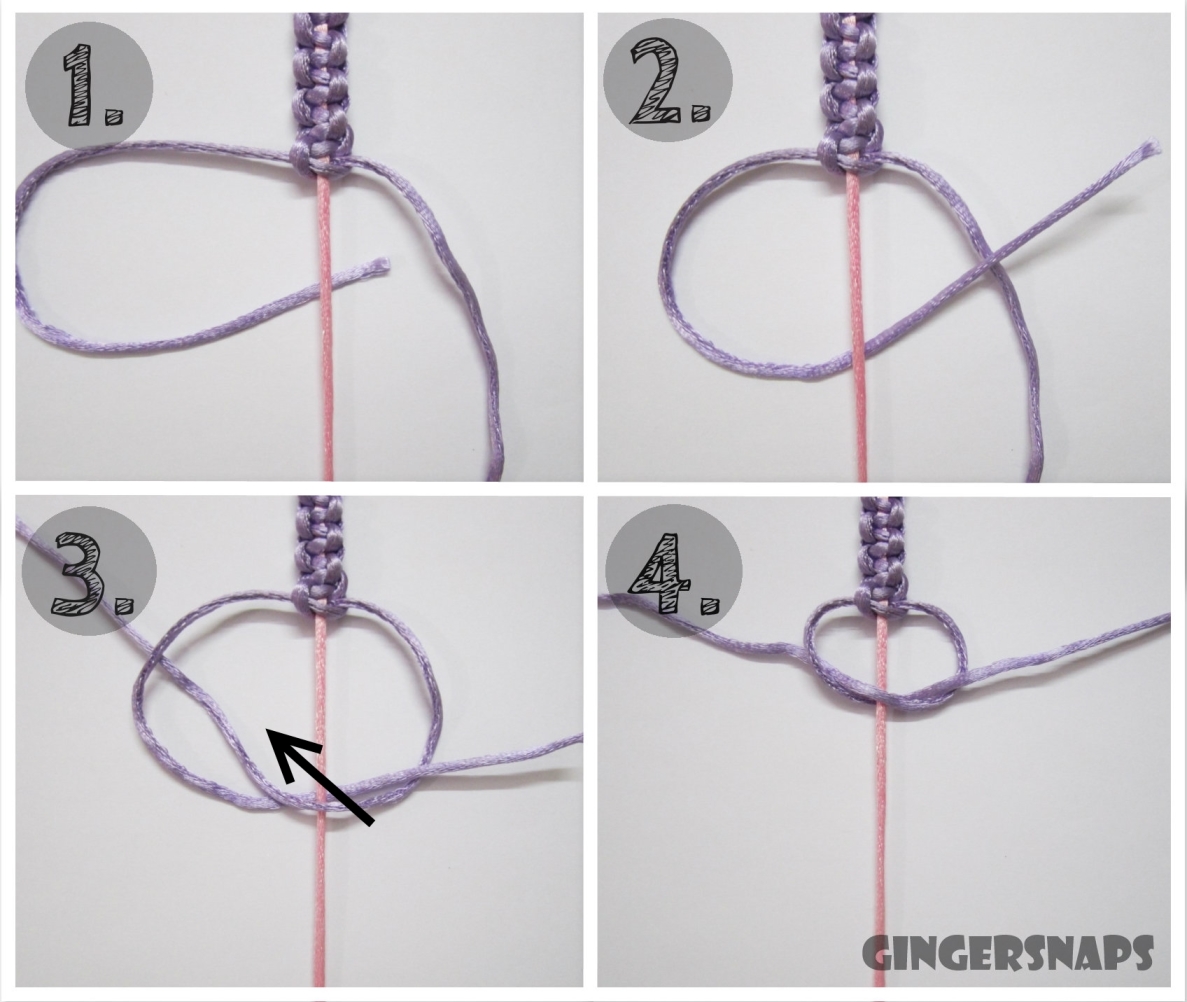
1. Place the left string under the base string.
2. Then the same left string over the right string.
3. Now take the right string over the base string and into the loop.
4. Pull on both the strings at the same time and tighten the knot.
Now we'll repeat the same process, this time starting from the right string.
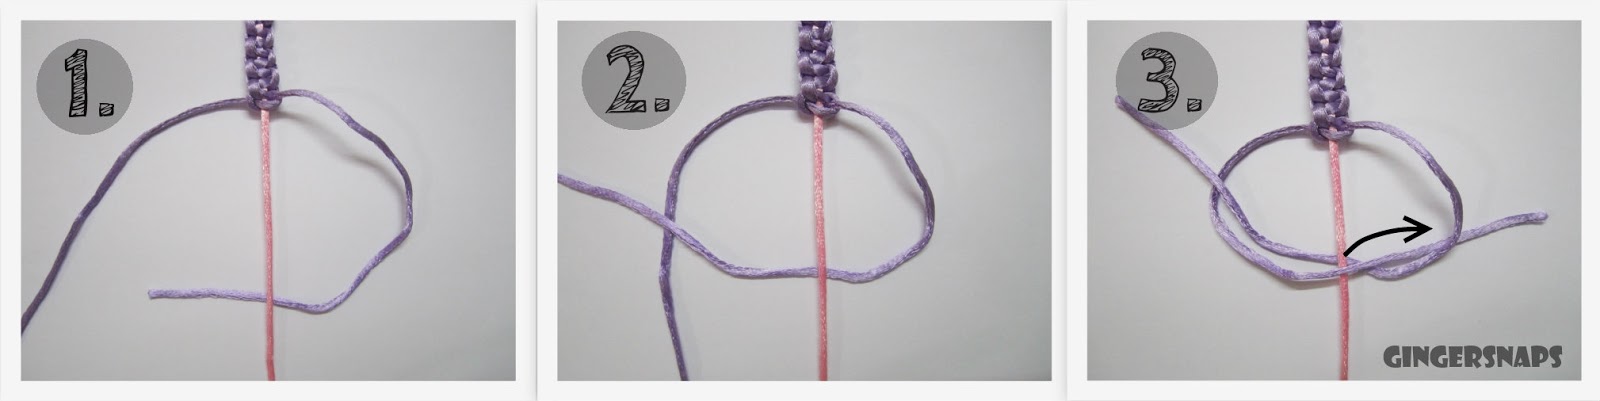
1. Right string under base string
2. Then over the left string.
3. Now the left string over the base string and into the loop.
Again, pull on both the strings at the same time and tighten the knot.
Keep on alternating the sides after each knot.
Repeat the process until you reach the desired length. When you have reached the length that you want, cut the two strings that you were working with (DO NOT CUT THE BASE STRING) as closely and neatly as possible and apply glue to the edges.
Now you can just tie a simple knot at both the ends of your base string and your bracelet is ready, or you can go one step further and make an adjustable closure for the bracelet.
1. Overlap the ends of base string.
2. Secure the ends with two pieces of tape.
3. Take a string about 8 inches long or more, of the color you want the adjustable closure to be. Now treat the two ends of the base strands that have been taped together as a single base strand and start making square knots again.
4. Make the adjustable closure of the desired length. Here I have made three square knots.
Cut the excess string and secure the edges with glue.

Tips:
- To secure the raw edges, instead of glue you can even use clear nail-paint.
- In the start when I was trying to get hang of the square knot technique, repeating the phrase "Under- Over- Over -Loop" while making the knots helped me. *hehe*
Here are a few hobby threads that I found on Amazon
:Jewellery Making Cotton Cord 2 mm
:Nylon Knot Macrame Beading Braided Thread Cord Rope, Thickness : 3 mm
:Nylon Knot Macrame Beading Braided Thread Cord Rope, Thickness : 3 mm
_____________________
*Phew*
This post
took a ridiculous amount of time to put together. If you still think that this
is going to be too difficult for you, get three strings and just give it a try.
This pattern may look elaborate but trust me, it is really, really easy to
make. Plus it is so much fun!
Hope you liked this easy and fun DIY! Let me know if you would like to see more of such posts.
Karishma
xoxo
P.S.
I'll be back to check for typos after a while. :P My mind has stopped working. For now I'll get as far from my laptop as possible. Please let me know if you
have any queries.
Wow Krishma, so creative honey! Love love this pretty bracelet <3
ReplyDeleteThank you Rakshanda! <3
DeleteI made the beore and love them. I also recently made fishtail bracelets on my YT. Loved the DIY and how you edited the pictures. You should definitly do more! :)
ReplyDeleteShivani
(Glam Diaries)
Thanks Shivani! I just recently came across your YT page! Awesome videos hun!
DeleteThat's lovely dear!! Even I wanted to share something similar. I love making bracelets myself. It's fun, I love yours:)
ReplyDeleteI love making these bracelets! However, I've never made any using this technique before. I'll certainly bookmark your tutorial so I can try it out. ^.^
ReplyDeleteOh do try this technique Roanna, it is so much fun!
DeleteLovely DIY Karishma. I am so gonna try it. I used to make colourful friendship bands in school, this DIY brought back all those happy memories.
ReplyDelete❤ Amena.
Fashionopolis
Bloglovin
Connect On Facebook
Talk On Twitter
Fab fab tut!!
ReplyDeletethis is just too cool! loved the pics.
ReplyDeleteOMG its so pretty in lilac <3
ReplyDelete~ amz88 Punky Bunny Blog, xoxo
so cute... I would love to made bands for my friends..it add a personal touch. thanks for sharing it.
ReplyDeleteSuch a sweet DIY! Looks really, really cute! :)
ReplyDeletecallmemaddie.blogspot.com